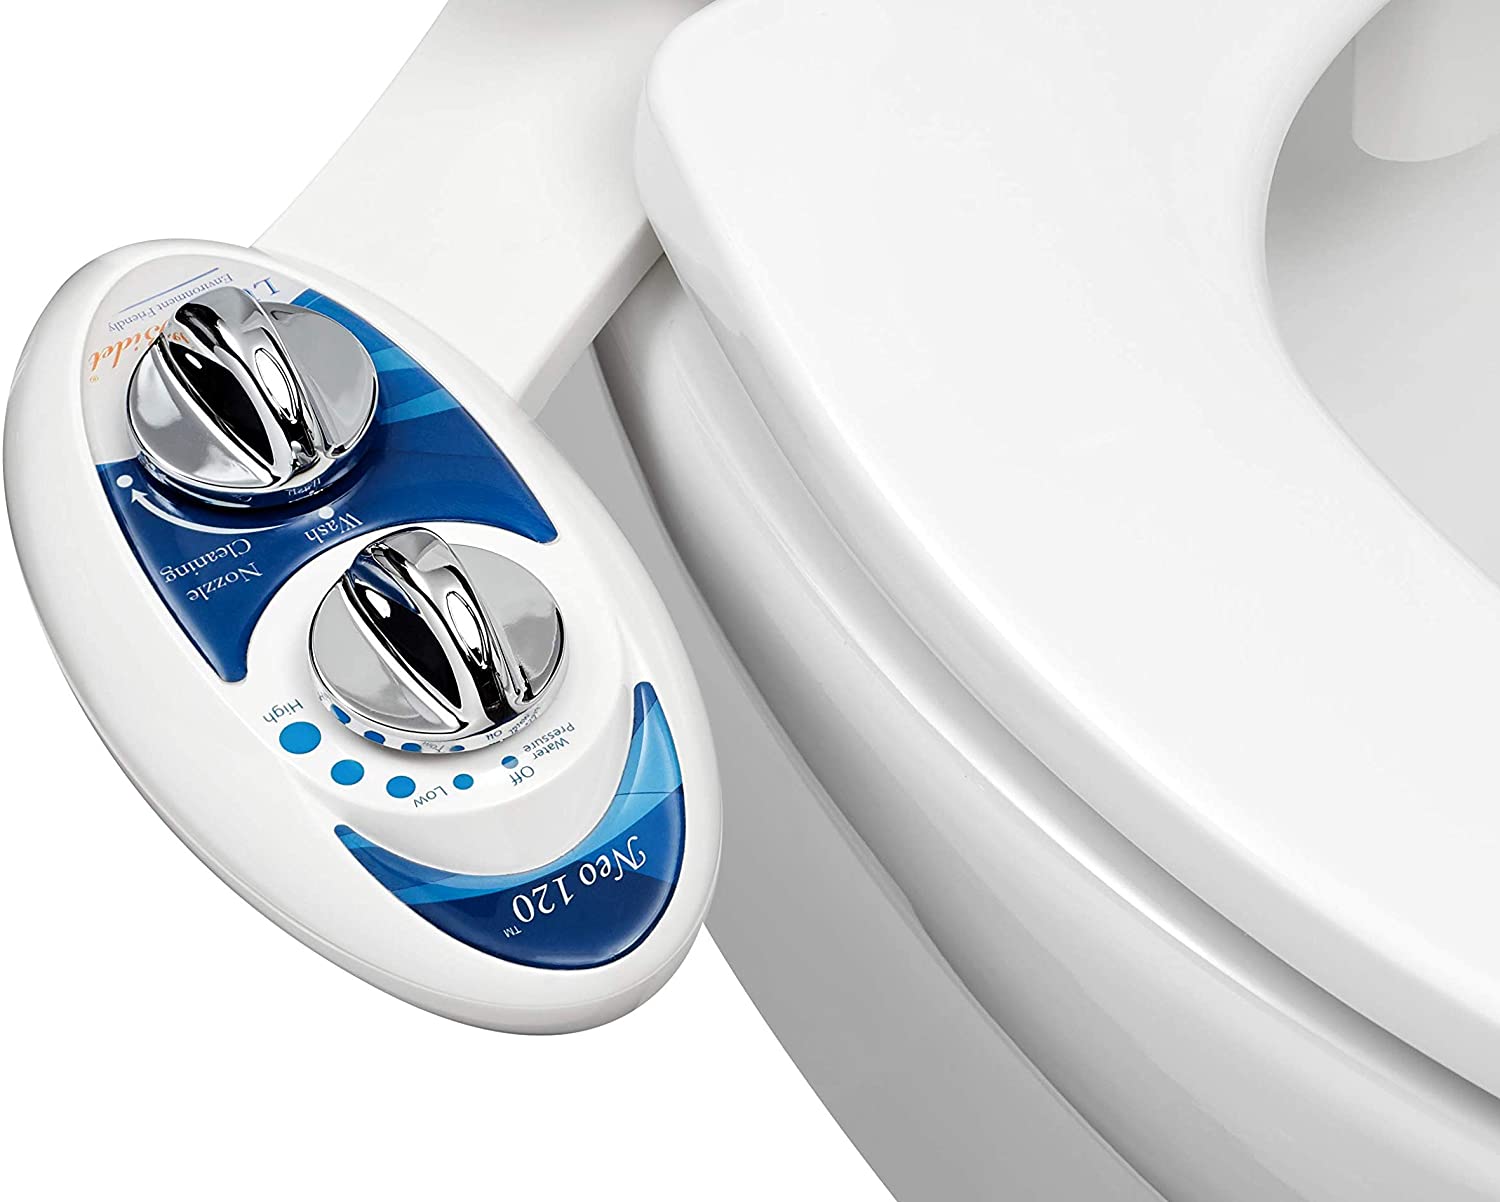
A simple bidet (like the Luxe Neo 120) can make a world of difference for improving thoroughness and accessibility of toilet hygiene.
However, I recently received a request online on how to install a bidet with a raised toilet seat, a topic I have not addressed before.
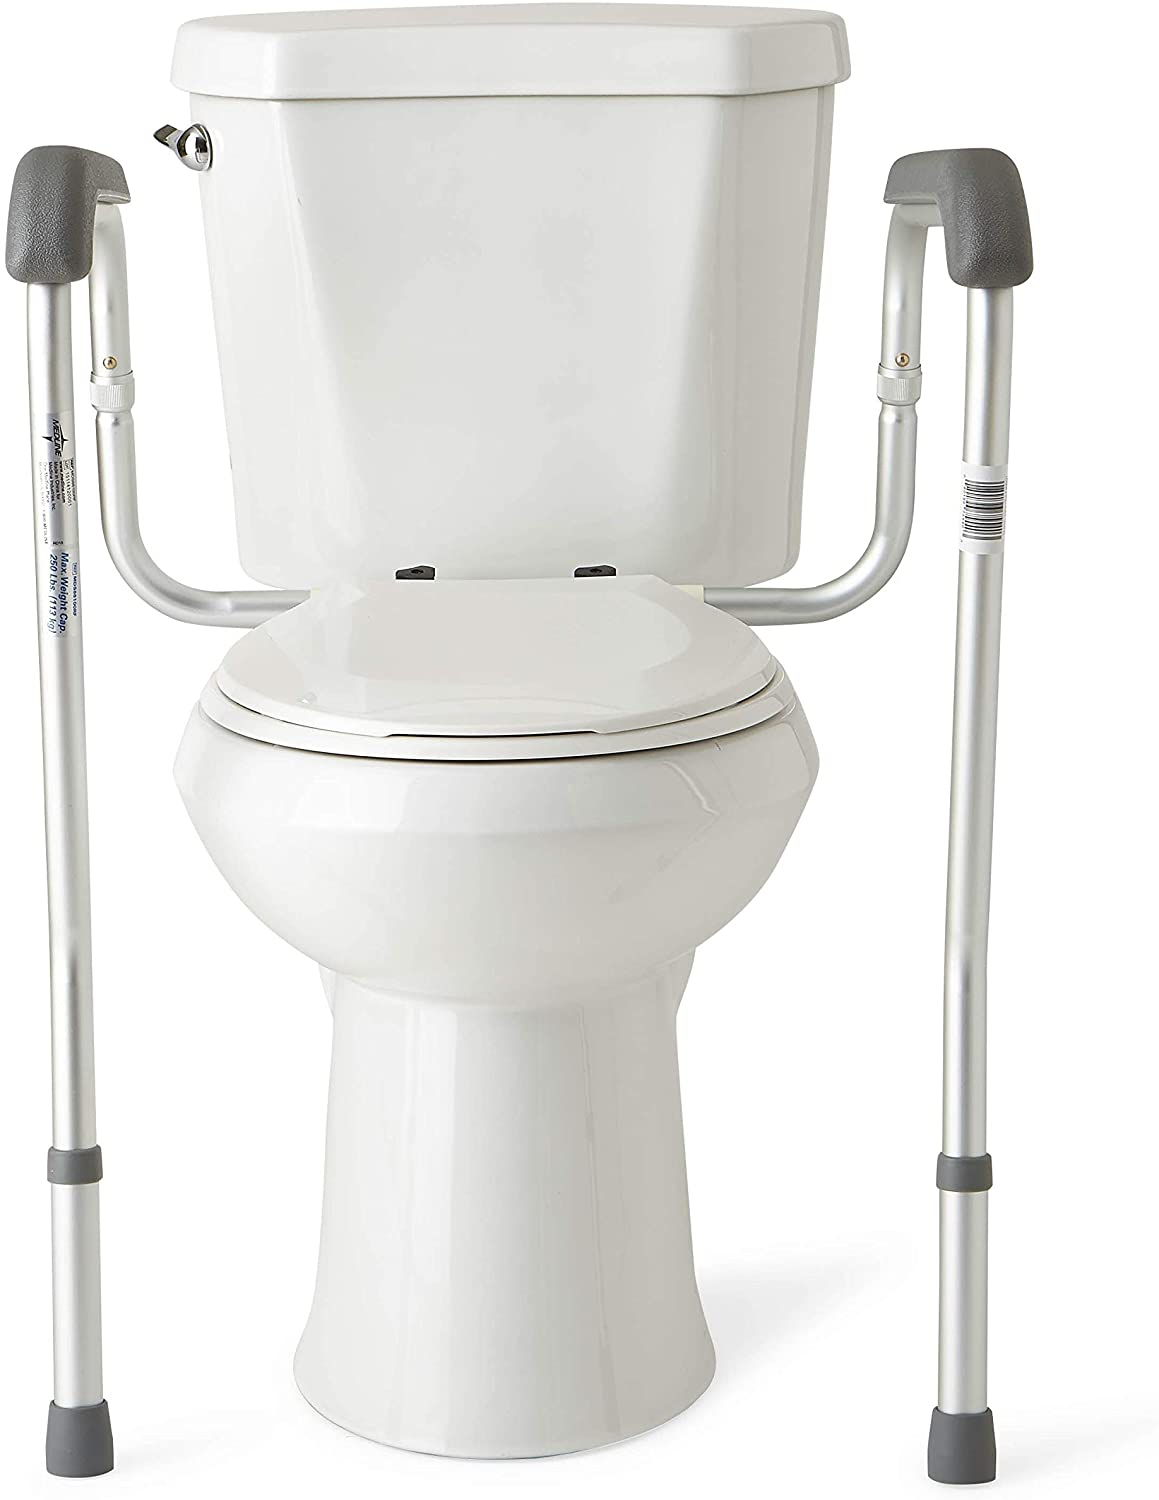
This was a great question. So, I wanted to discuss how to safely combine a raised toilet seat and safety frame with a bidet to improve overall ease of use for anyone dealing with additional physical limitations.
For additional details on how to install the bidet system, I’d recommend reviewing my post on how to install the Luxe Bidet Neo 120.
If you prefer the video version of the complete process of installing the raised toilet seat and safety rail check out my YouTube Channel EquipMeOT.
Overview:
Estimated Time: 30 mins
Estimated Cost: $100
Please note: Before we begin, please make sure you follow all the instructions and warnings provided by the manufacturer. The steps below are only to provide guidance with installing or assembling equipment, but you should always follow the warnings and instructions provided by the manufacturer.
Supplies Needed:
- Raised toilet seat with detachable arms or without arms
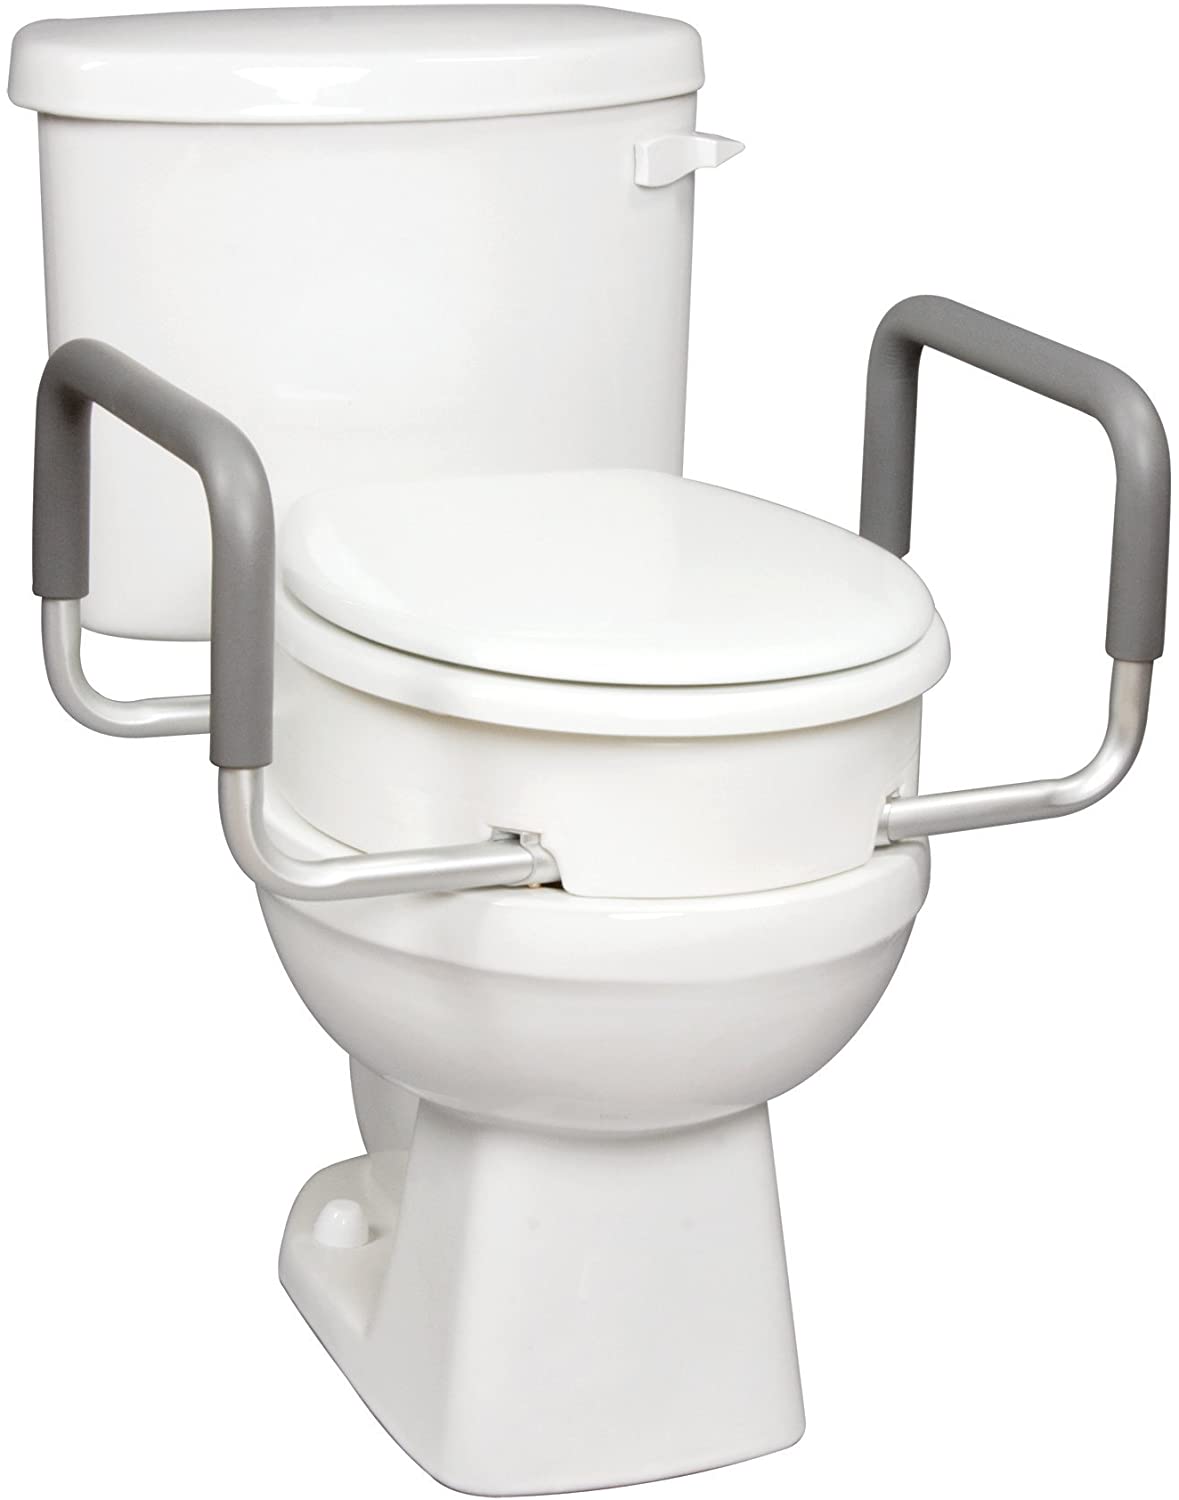
The raised toilet seat needs to be the under toilet seat mounted variety to work the way I set mine up. It is also important that the raised toilet seat comes with either no arms or detachable arms like the one below. Arms will interfere with the water line on the bidet as demonstrated in step 3.
Tools Needed:
- Philips head screw driver
- Adjustable wrench (for bidet installation)
Steps:
- Remove toilet seat
- Place toilet safety rail system in position
- Place raised toilet seat in position on top of rail system
- Place bidet system in position over raised toilet seat (assuming water lines have already been hooked up)
- Place toilet seat in position over bidet
Step 1: Remove toilet seat
Before the installation process begins, you will need to remove your toilet seat from the toilet. I always recommend giving a good cleaning to the toilet at this time as it will be difficult to do this once the riser is in position.
You will want to verify that your toilet seat is one with removable bolts in the back at this time because you will be replacing the bolts with the longer ones that come with the raised toilet seat kit.
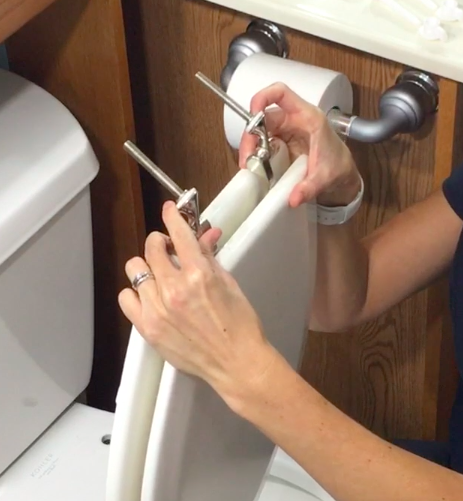
Step 2: Place toilet safety rails in position
For the next step, the toilet safety rails will need to be placed in position. The toilet safety rails are first in the order.
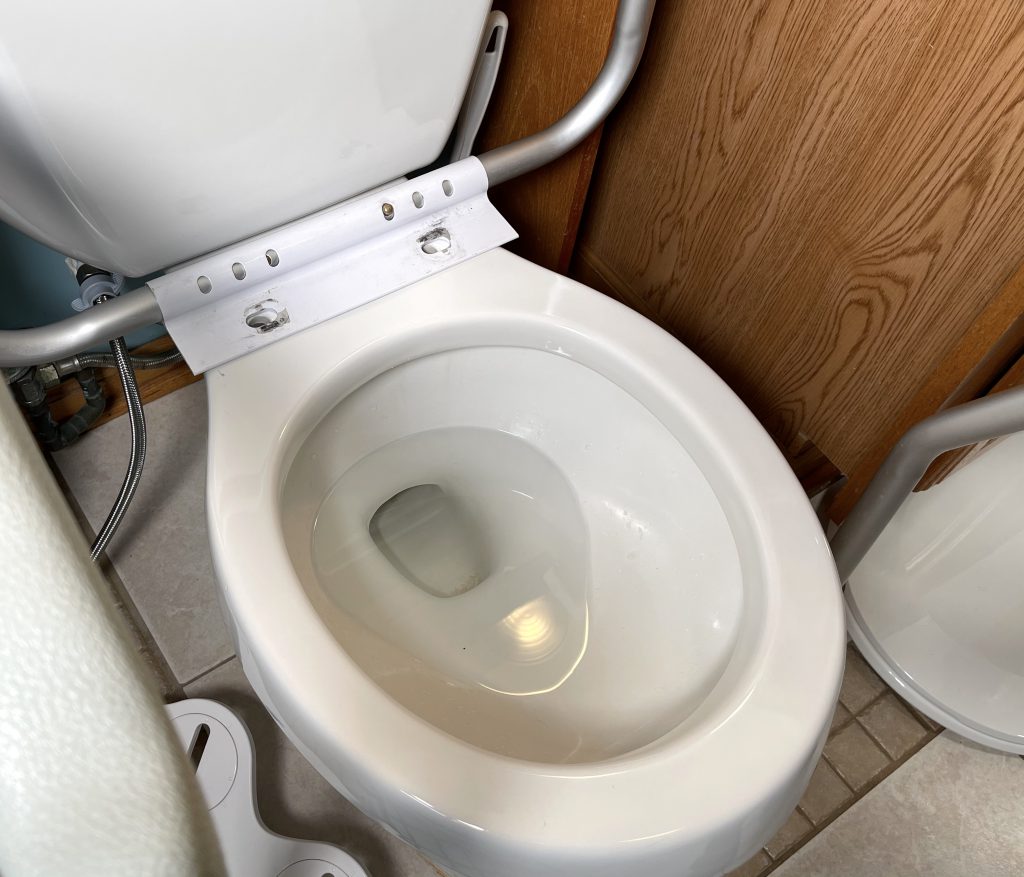
Put the toilet safety rails in place on the toilet, but do not mount them with the bolts until the rest of the products are put in place.
Step 3: Place raised toilet seat in position
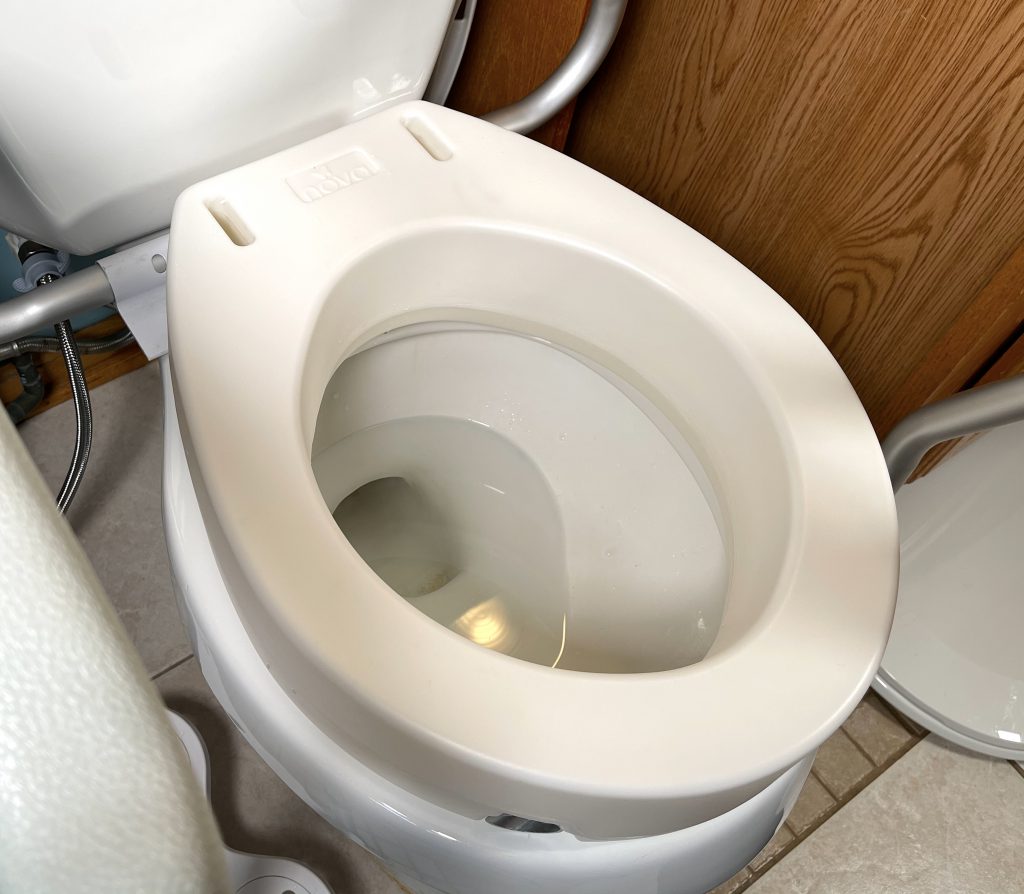
Place the raised seat on top of the toilet safety rails next. You’ll need to remove the detachable arms now if they are already attached.
The holes on the back of the raised toilet seat should align with the holes on the toilet and the toilet safety rails.
It is essential you use a raised toilet seat that mounts under the toilet seat for it to work with the bidet system I am using. If you need more detailed instruction, I have another post on the how to install a raised toilet seat.
Earlier, we mentioned that it was important to get a raised toilet seat with detachable arms. If you try to place the raised toilet seat with the arms attached, the arms will interfere with the bidet water line when you try to install and mount the bidet as seen in the picture below.
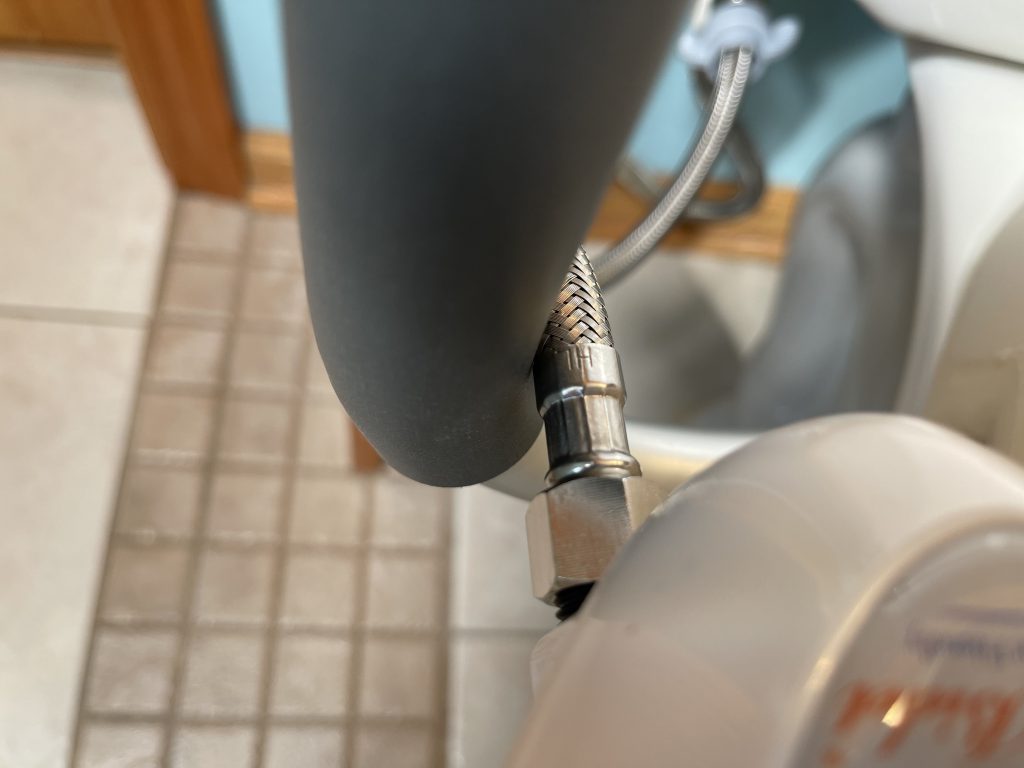
This interference will make it impossible to align the bidet with the holes on the raised toilet seat.
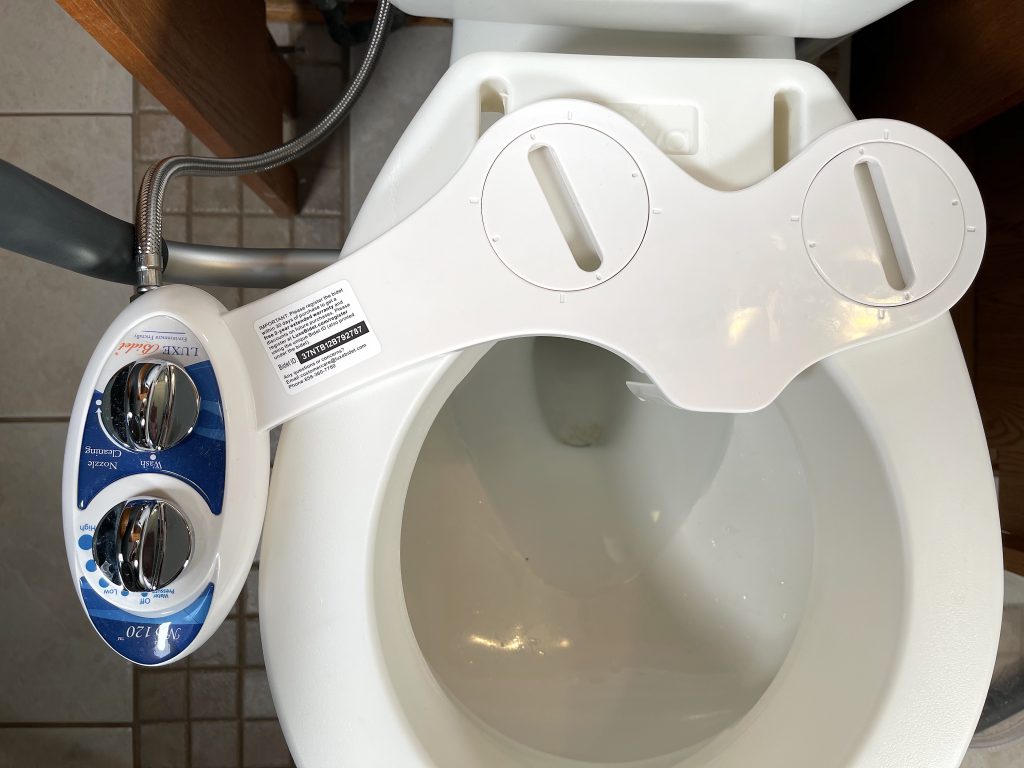
Step 4: Place bidet in position
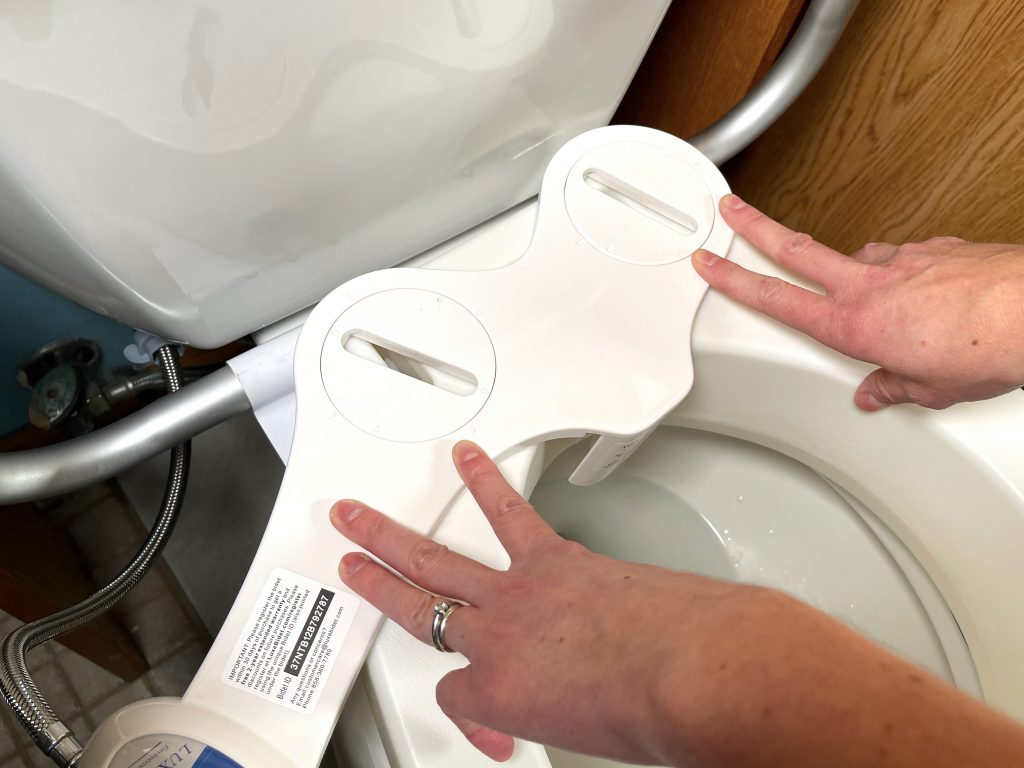
Next, place the bidet on top of the raised toilet seat and align the mounting holes.
The bidet should be assembled and hooked up to the water lines before placing it in position over the raised toilet seat to ensure it has a long enough line to work with your combination of products. I have another post if you need additional details on how to install the bidet system.
Step 5: Place the toilet seat in position
Finally, set the toilet seat in position. It is vital that all the holes line up on the back of the toilet so the mounting bolts will drop into position.
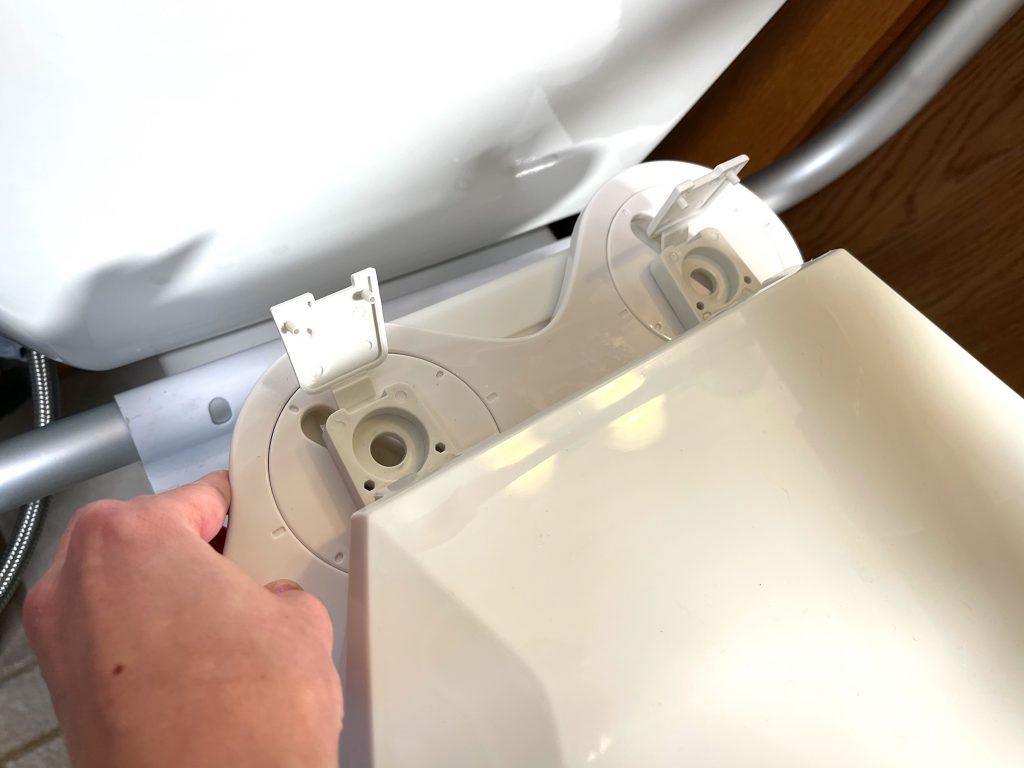
Slide the toilet seat mounting bolts through the mounting holes. Do not tighten the bolts all the way down until you have positioned all the items in alignment.
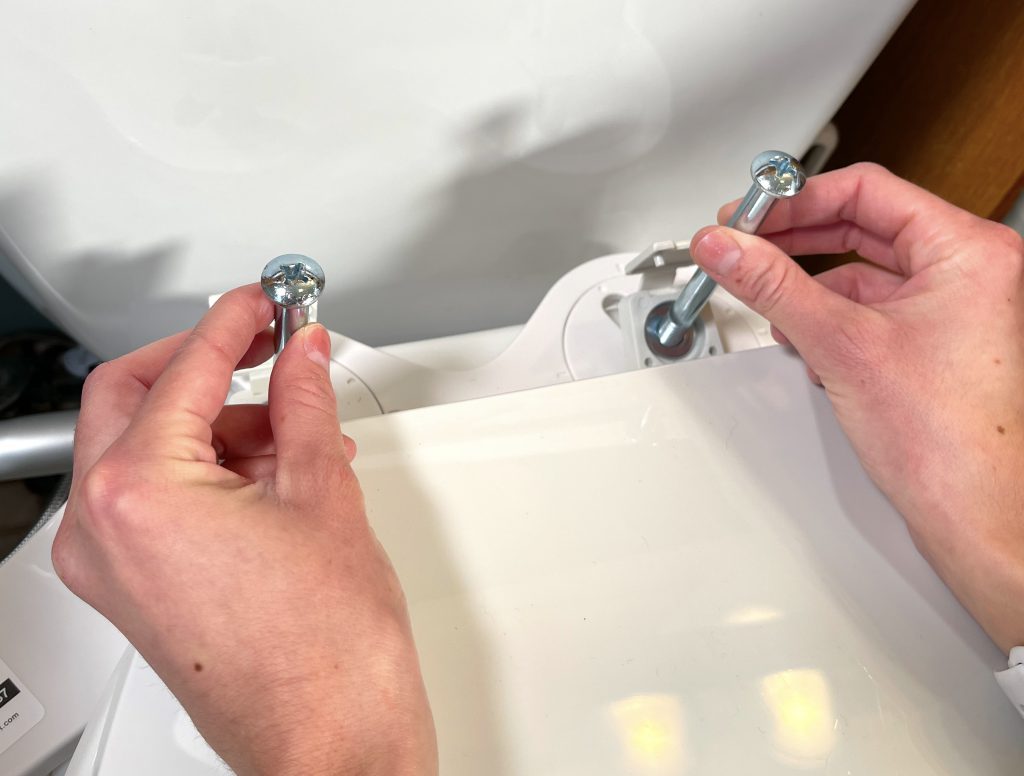
Once this is complete, tighten everything down using a Philips head screw driver and the wing nuts or bolts that came with your raised toilet seat kit.
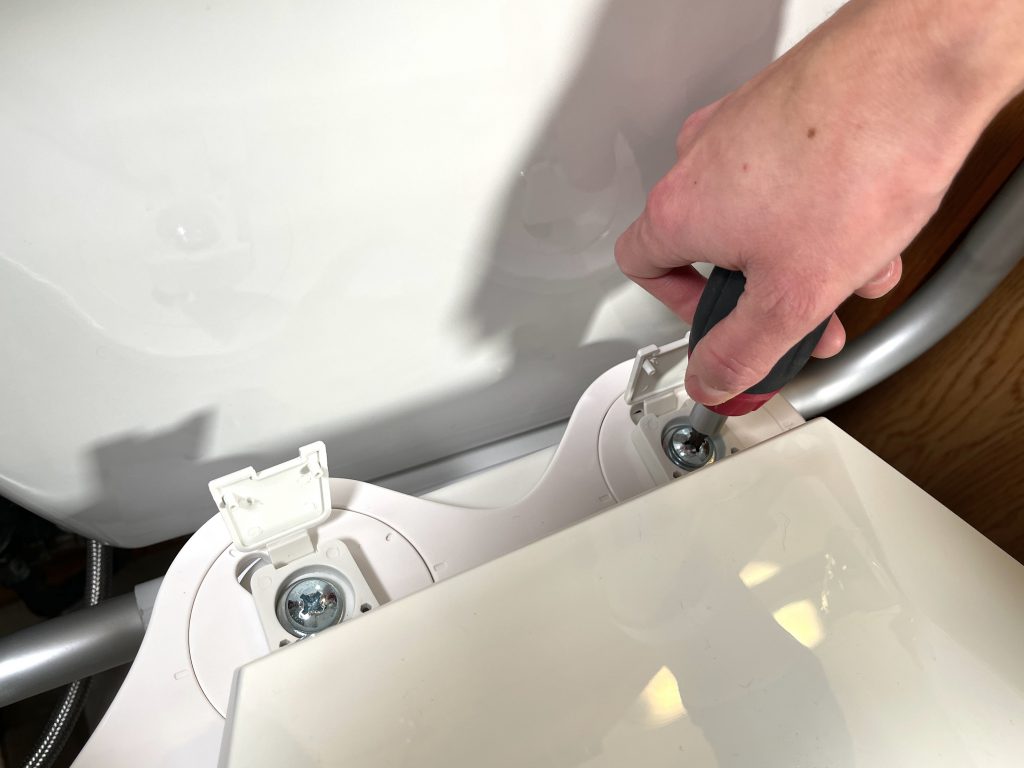
Note: Always double check the stability of your safety rails and toilet seat before sitting. You may need to check this and tighten the wing nuts every week or more often if you notice some loosening occurs.

Note: This post contains affiliate links that provide a small commission without any added cost to the user.
More Recent Posts
- How to Sleep After a C-Section or Abdominal SurgeryRecovering from a C-Section, appendectomy, abdominoplasty, or other abdominal surgery can feel overwhelming, especially when it comes to something as essential as sleep. With a tender incision and limited mobility, finding a comfortable position may seem impossible—and yet, proper rest is critical for healing! In this …
How to Sleep After a C-Section or Abdominal Surgery Read More »
- How to Get In and Out of the Car after Hip ReplacementGetting in and out of a car after a hip replacement can feel like navigating an obstacle course. Ensuring you move safely and avoid unnecessary strain on your healing hip is essential for a smooth recovery. Whether you’re heading to a follow-up appointment or simply enjoying …
How to Get In and Out of the Car after Hip Replacement Read More »
- A Complete Guide to Lower Body Dressing After Hip Replacement SurgeryRecovering from hip replacement surgery (or similar traumatic injury) comes with its challenges, especially when it comes to everyday tasks like getting dressed. While your mobility may be temporarily limited, dressing your lower body can be made much easier with the right strategies and tools. This …
A Complete Guide to Lower Body Dressing After Hip Replacement Surgery Read More »

